Looker
Column-level lineage and details in data dictionary become available within 15-20 minutes after integration.
Create integration
To enable Masthead for Looker, please follow the next steps:
Create a permission set
- In the navigation bar go to Admin > Roles and click New Permission Set.
- Name your permission set
masthead_permissions. - Select the necessary permissions:
access_dataaccess_data.see_lookml_dashboardsaccess_data.see_looksaccess_data.see_looks.see_user_dashboardsaccess_data.see_looks.exploreaccess_data.see_looks.see_lookmlsee_system_activity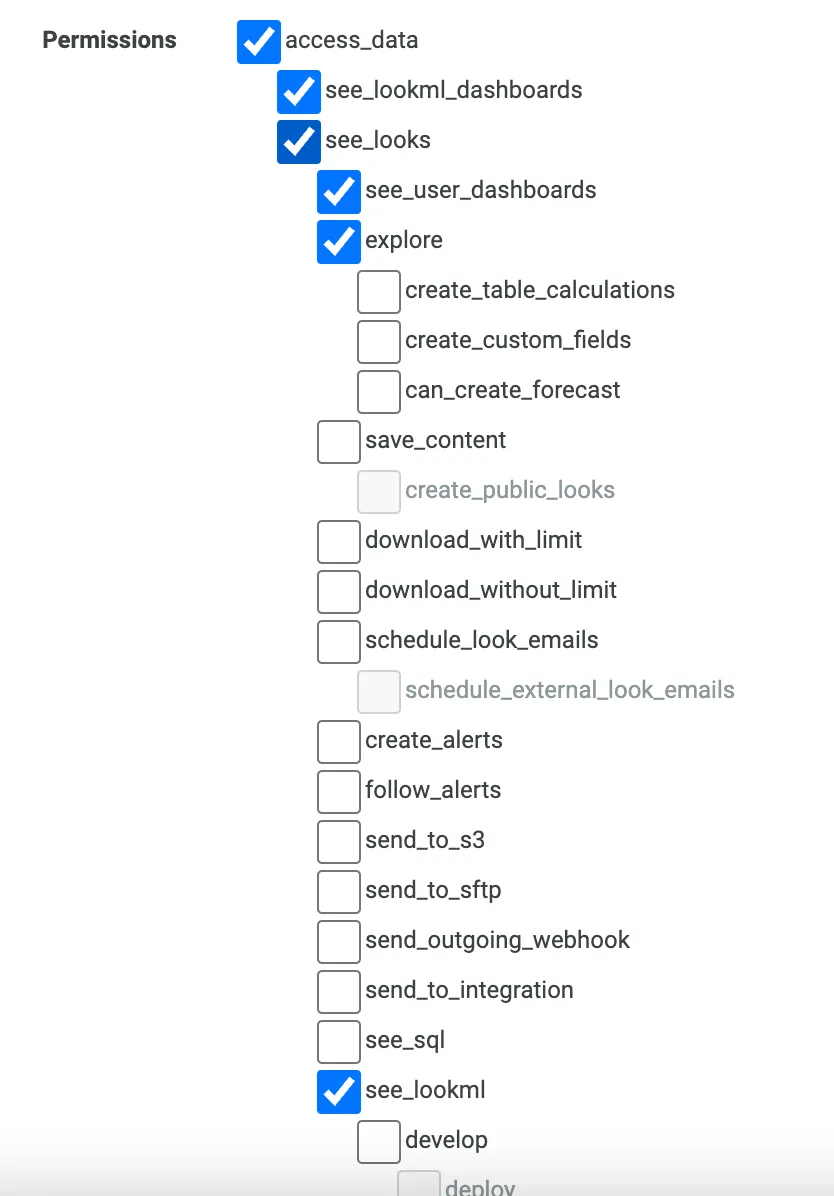
- Click New Permission Set to save.
Create a role
- Go to Admin > Roles and click New Role.
- Name a new role
masthead_role. - Select the permission set
masthead_permissions. - Select a model set
All. - Click New Role to save.
Create a user and save API credentials
- Go to Admin > Users and click Add -> Service Account.
- Enter a Service Account Name to
masthead_service_account. - Toggle Create default set of API credentials option ON.
- Select the role
masthead_role. - Click Save.
- Click Edit Keys and copy Client ID and Client Secret values.
Check content read access for a Masthead user
You can decide which folders to give access to.
- Go to Admin > Content Access.
- Select Shared folder and click Manage Access…. Check that All Users group already has View or Manage/Edit Access.
- Click Save.
- Repeat with the Users and other folders.
Completing Looker integration configuration
- Open Integrations page in Masthead and click Connect for Looker.
- Enter Host URL and port - address of your Looker instance.
- Enter Client ID and Client Secret you’ve copied in the previous step.
- Click Save.
Looker integration configuration is complete.